
Customer support
All registered users can open a support ticket and track its status and responses from our team.

USER ACCOUNTS · YOUR TEAM
Bringing in a new person starts with agreeing on the work they will perform. Prepare a separate account and store access for each team member instead of sharing existing login details.
This guide helps the responsible person prepare access assignment. Only a person authorized to do so should add or change an account, or the process should be coordinated with the Connect team.
Go through the guide
VISUAL GUIDE · ADDING A TEAM MEMBER
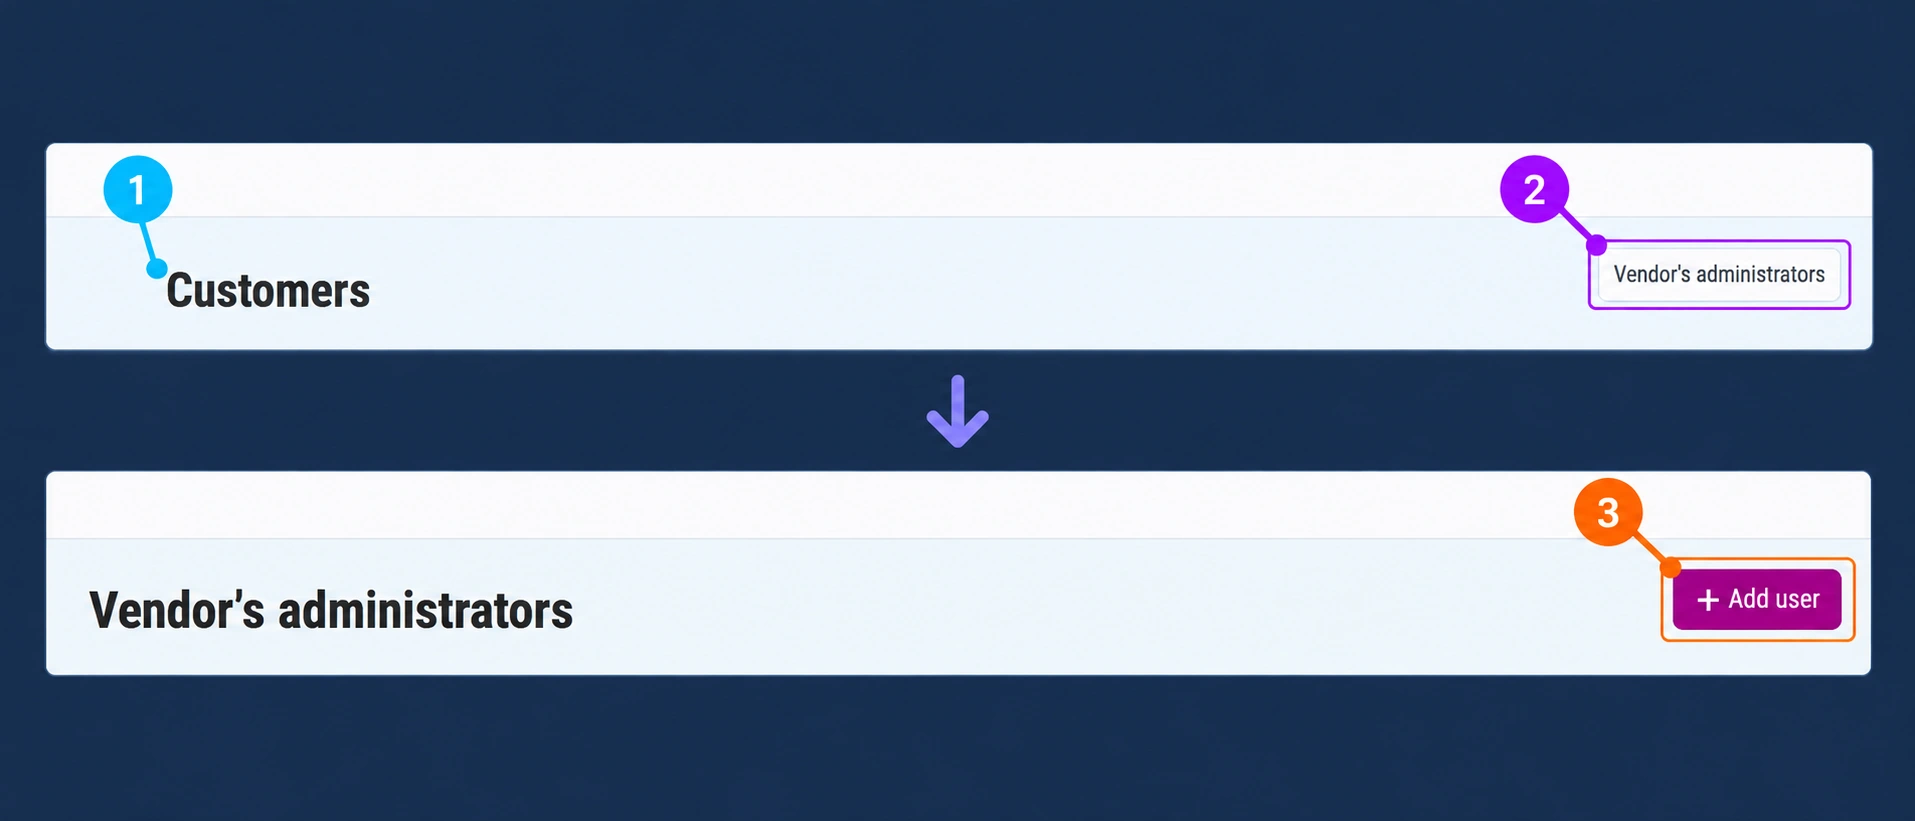
In the administration, open Customers, then the Vendor’s administrators button, and select Add user from the administrator list. Customers and members of your administrative team are separate types of users.
The interface in the images is in English for use with all language versions of the guide. Only sample data is shown; the images do not confirm that an account has been created.
Gather the details before requesting or entering the account. Check whether the person already has a user account so you do not unnecessarily create additional records for the same access.
Specify whether the person needs to work on the catalog, orders, content, or other tasks. If the engagement is temporary, agree on when you will review the need for access again.
Check whether the person needs to enter descriptions and photos, change prices, or manage availability.
Determine whether they need to view orders, change statuses, and communicate with customers.
Agree separately on changes to business settings and access for other people.
These are examples of tasks, not names of guaranteed user roles. Available permissions should be checked in your administration.
If you have user management permissions, follow the path Customers → Vendor’s administrators → Add user. The New profile: Vendor’s administrator form opens. Before confirming, check the person's details, seller affiliation, and agreed scope of access.
If this option is not available, send the prepared request to the responsible person or Connect Support. Do not temporarily direct the new person to use a colleague's account.
Instructions for setting a password and signing in should be intended for the account owner. Send the new person the official administration address and the agreed description of responsibilities, without sharing someone else's passwords.
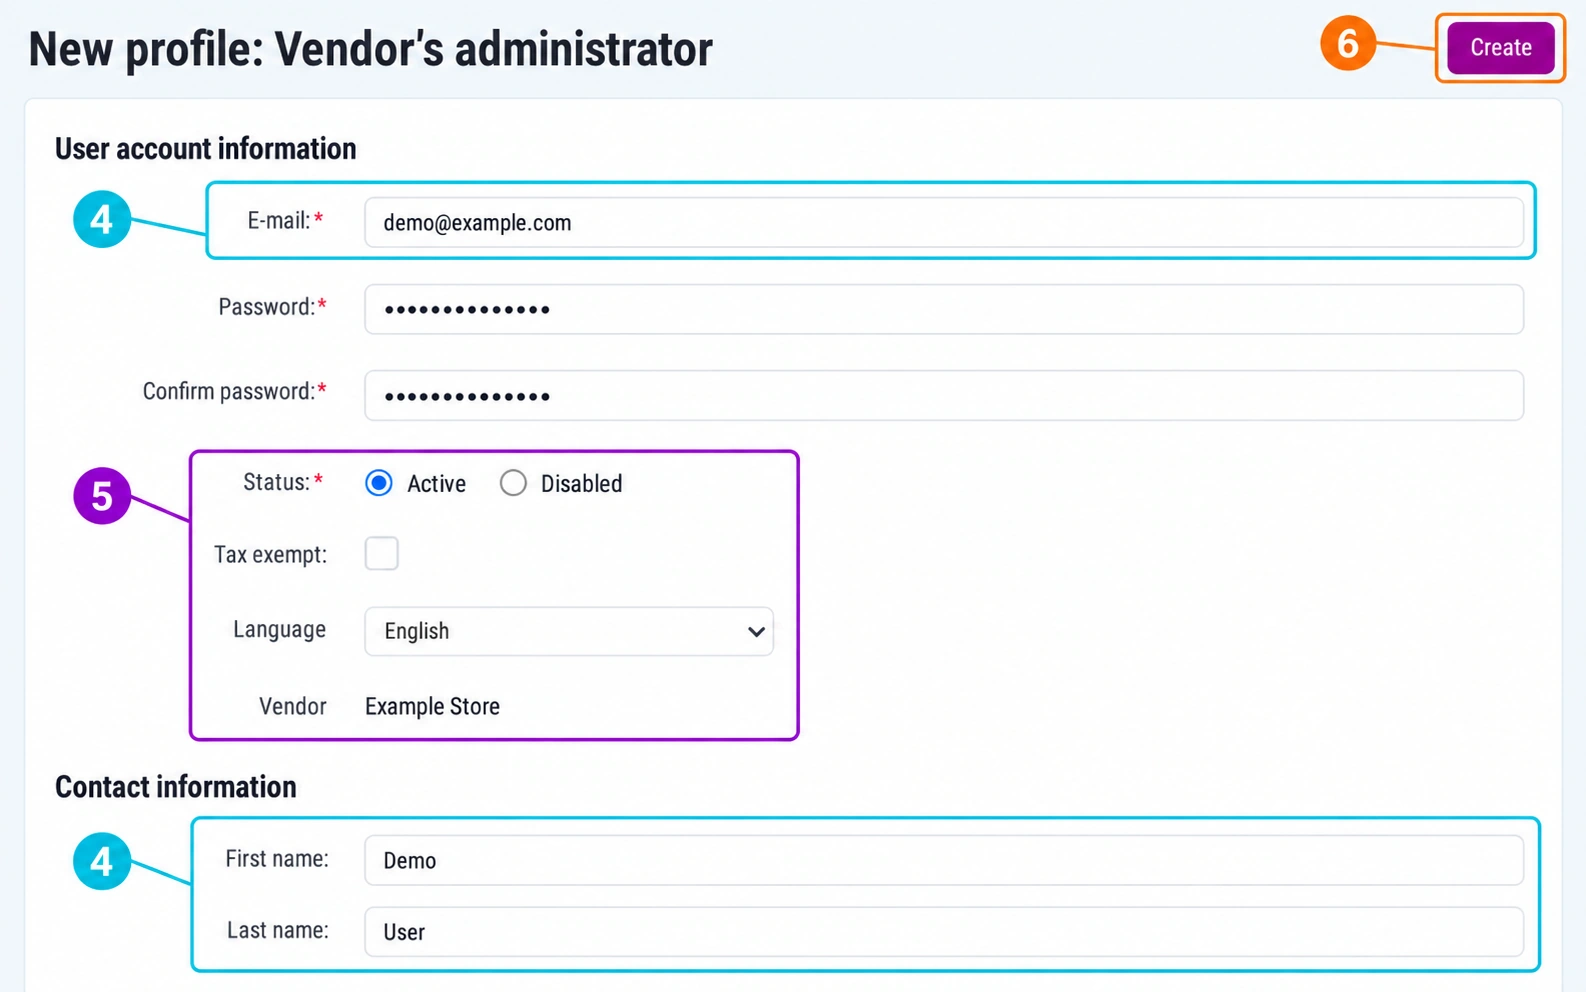
4 · Person's details
In E-mail, enter the new member's address, and in First name and Last name, their first and last name. Complete the Password and Confirm password fields according to the form requirements and the agreed access assignment process.
5 · Vendor and Status
Vendor must correspond to the seller the person works for. Check whether the account should be Active or Disabled. The selected status does not replace checking the required permissions.
6 · Create
This button confirms account creation. Before clicking it, review the details and affiliation and check whether the person already has an account.
Tax exempt concerns tax exemption, not user permissions. Do not enable it to add a team member. Complete the other fields according to your actual needs and the requirements of your form.
Provide the new member with access instructions through the agreed official process. Do not send them someone else's password. Creating an account by itself does not confirm that the notification was delivered or that all required permissions have already been checked.
If Add user or the administrator list is not available, do not add the person as a customer to obtain access. Request verification from the responsible person or Connect Support.
Ask the team member to sign in independently and confirm that they can see the appropriate store. Go through the necessary menus and the agreed way of working.
Perform the first check by reviewing existing data. For changes that affect prices, purchases, or notifications, agree on a specific test and expected result in advance.
First sign-in instructions · Selecting a store and working language
Keep an up-to-date overview of the people who need access and their responsibilities. When someone changes jobs or ends their collaboration, check whether permissions should be adjusted or access revoked.
Assigning a Connect Marketplace account does not automatically grant access to email, integrations, or other business tools. For these services, check the separate accounts and responsible people.
Arrange separate user accounts for team members. An address for shared business notifications can be set up separately, according to the available settings.
Include the existing address in the access request. An authorized person should check the appropriate assignment method; customer registration alone does not confirm access to the seller.
Only if your account has the appropriate permissions and this is consistent with the agreed management process. Otherwise, request the assignment from the responsible person or Support.

